


Rear seat cover installation should protect the cushion without covering child-seat anchors, seat-belt buckles, split-fold release points, cupholders, or fold-down armrests. The safe method is simple: map every moving or safety-related opening first, install the cover loosely, then tighten only after every LATCH anchor and seat function still works.
Rear Seat Installation Steps
- Find the lower LATCH anchors, tether anchors, buckles, armrest seam, and split-fold seams.
- Remove headrests if your vehicle allows it.
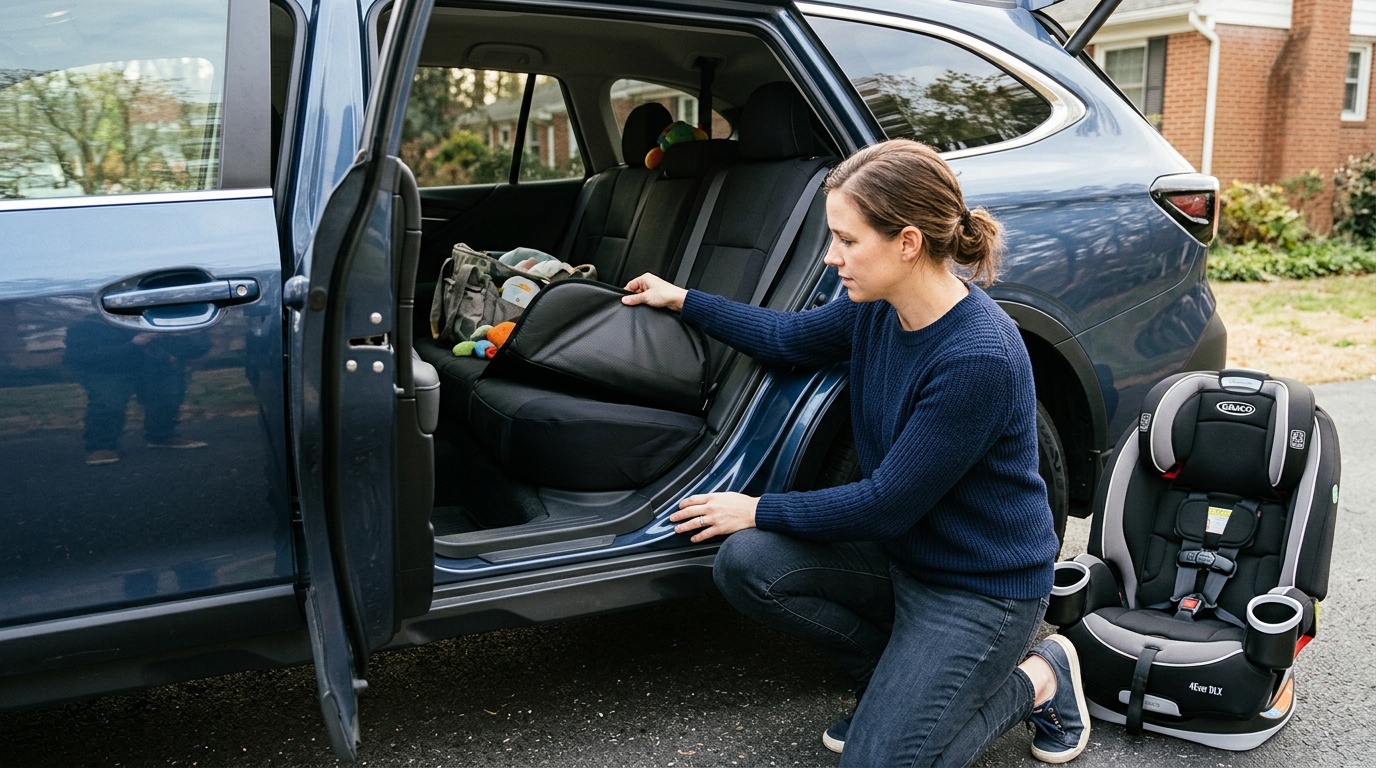
- Lay the cover flat and align every opening before tightening straps.
- Feed straps behind the seat, never across anchors.
- Test buckles, armrests, and folding seats.
The biggest mistake is treating the rear bench like one flat cushion. It isn't. A 2021 Jeep Grand Cherokee rear seat has lower anchors tucked into the seat crease, a center fold-down armrest, and 60/40 split folding. A 2023 Toyota RAV4 has visible buckle stalks and a split bench, but the anchor angle feels different once fabric is under tension.
Start with a "no-cover map" before you touch a strap:
| Rear-seat area | Keep clear | Why it matters |
|---|---|---|
| Lower LATCH anchors | Two metal bars in the seat crease | Child-seat connectors need direct access |
| Top tether anchors | Back of seat or cargo-area anchor points | Forward-facing child seats often need them |
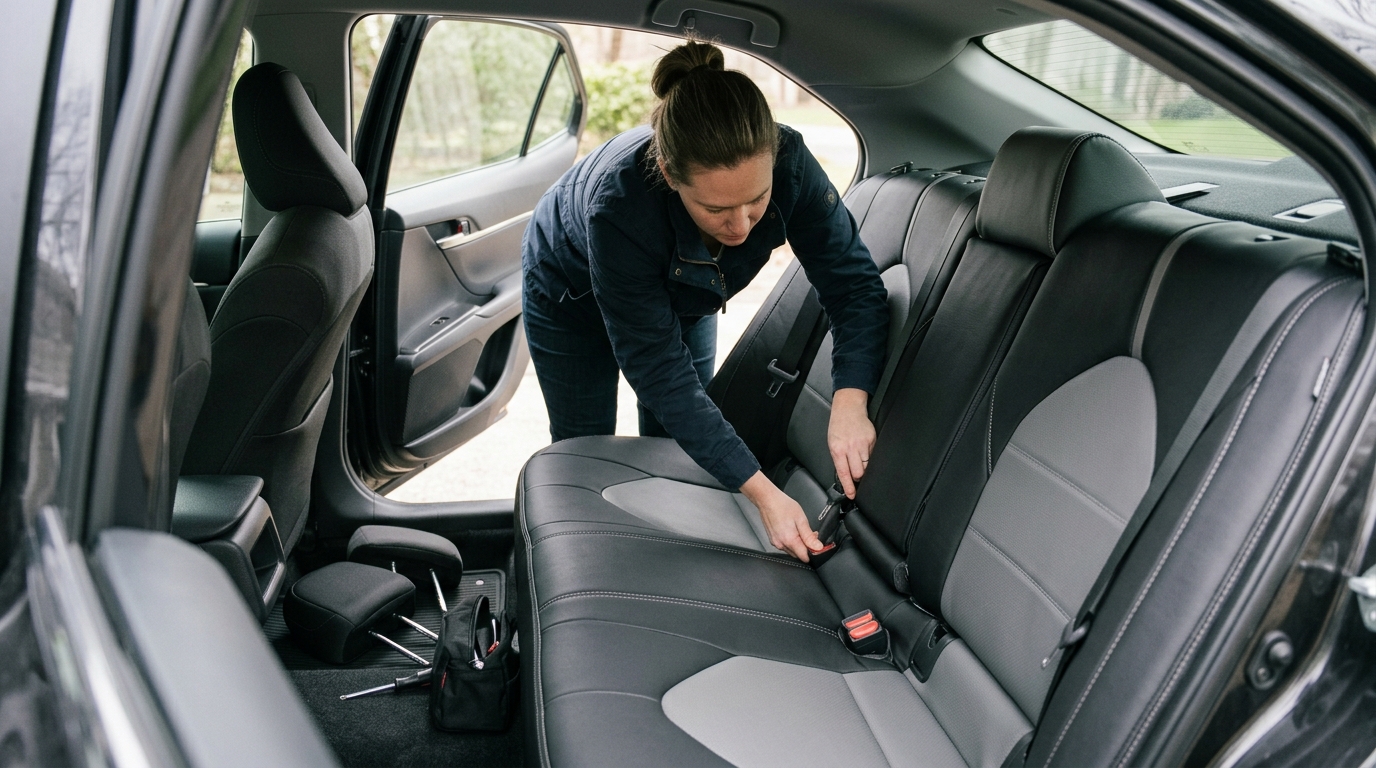
| Seat-belt buckles | Buckle stalks and receiver buttons | Passengers need one-hand access |
| Fold-down armrest | Center seam and pull tab | Cupholders and pass-throughs must open |
| Split-fold seam | 40/20/40, 60/40, or 50/50 joint | Seats need to fold without pulling fabric |
| Headrest posts | Post holes and lock buttons | Headrests must reinstall and adjust |
The U.S. National Highway Traffic Safety Administration says child restraints should be installed according to both the child-seat manual and the vehicle owner's manual; that matters here because a seat cover adds one more layer near the same anchor points. Read the vehicle manual first, especially on Honda CR-V, Ford Explorer, Jeep Wrangler, Subaru Outback, and Chevrolet Tahoe models where tether anchor locations vary by row and model year. Source: NHTSA child passenger safety guidance.
Coverado customers report that most rear-seat confusion comes from two things: hidden LATCH bars and unexplained extra pieces in the kit. Those extra pieces usually aren't spare parts. Hooks, chucks, elastic loops, and clips each solve a different tension problem, which is why we break them down separately in our guide to seat cover installation accessories.
LATCH Anchors Stay Open
LATCH access beats a cleaner-looking tuck every time.
Look for the lower anchors before you install the cover. In most U.S. vehicles, they're where the seat back meets the cushion, often marked by a small button, tag, or child-seat icon. On a 2022 Jeep Wrangler Unlimited, the anchors may sit deep in the crease. On a 2024 Hyundai Palisade second row, they're easier to spot but still easy to cover if you pull a bench cover too tight.
Do this before tightening:
- Press your fingers into the seat crease and locate both lower anchor bars.
- Mark the access points mentally, or use removable painter's tape on the plastic trim.
- Align the rear cover's slots, seams, or flexible edge so the anchors remain reachable.
- Buckle and unbuckle each rear seat belt once after the cover is on.
- Attach a child-seat connector only if the vehicle manual and car-seat manual allow that seating position.
Don't cut new holes into a seat cover unless the manufacturer specifically allows it. A clean cut can become a tear after a few weeks of passengers sliding in and out, especially on high-stress spots near buckle stalks.
One more detail: LATCH isn't always available in every rear seating position. The American Academy of Pediatrics notes that correct child-restraint use depends on the child, the restraint, and the vehicle seating position. Source: AAP car seat guidance. If your center seat doesn't have dedicated lower anchors, the cover can't fix that. Use the approved belt path instead.
Armrests And Cupholders
The center armrest is where a good rear cover either feels custom or gets annoying fast.
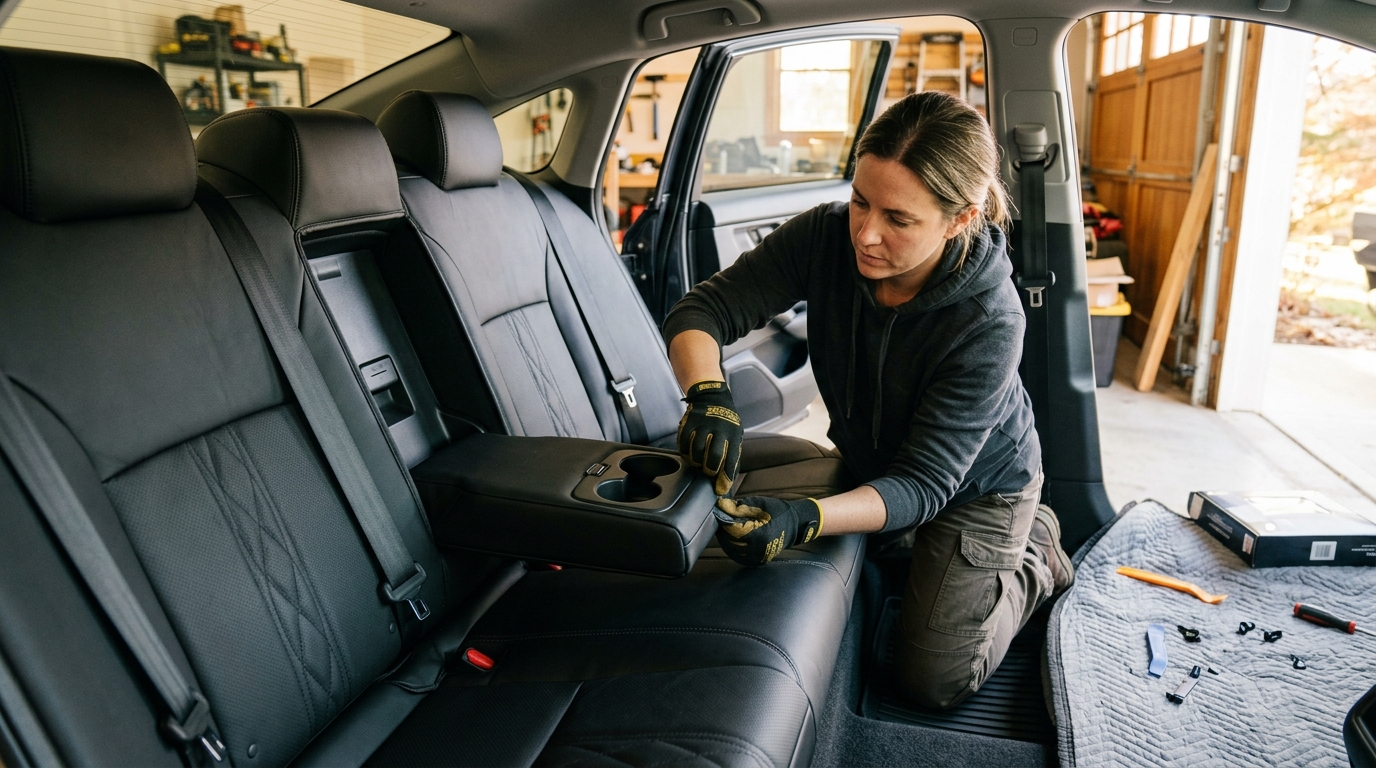
Fold the armrest down before you finish installing the cover. If the cover pulls across the center seam like a drum, the armrest will either stay trapped or yank the cover out of place every time someone opens the cupholders. This is common on Jeep Grand Cherokee, Toyota Camry, Honda Accord, Lexus RX, and Ford F-150 SuperCrew rear benches.
For rear seats with a fold-down armrest, align the cover around the armrest seam first, then work outward toward the doors. That order works better than starting at both outer corners because the center armrest has less tolerance for fabric tension. The corners forgive you. The armrest doesn't.
Use this quick test:
| Test | Good result | Fix if it fails |
|---|---|---|
| Pull the armrest down | It opens without dragging fabric | Loosen center straps and realign seam |
| Open cupholder lid | Lid clears the cover edge | Tuck fabric lower around the hinge area |
| Return armrest upright | Cover doesn't bunch at top | Smooth fabric upward before tightening |
| Sit in center position | Buckle remains reachable | Re-route strap away from buckle stalk |
If your rear seat has a ski pass-through or cargo pass-through behind the armrest, test that too. A cover can look perfect from the front and still block the pass-through door from the trunk side. Annoying discovery, usually made while holding lumber in a parking lot.
Split-Folding Seat Fit
A split rear bench needs independent tension. One long pull across the whole seat is the wrong move.
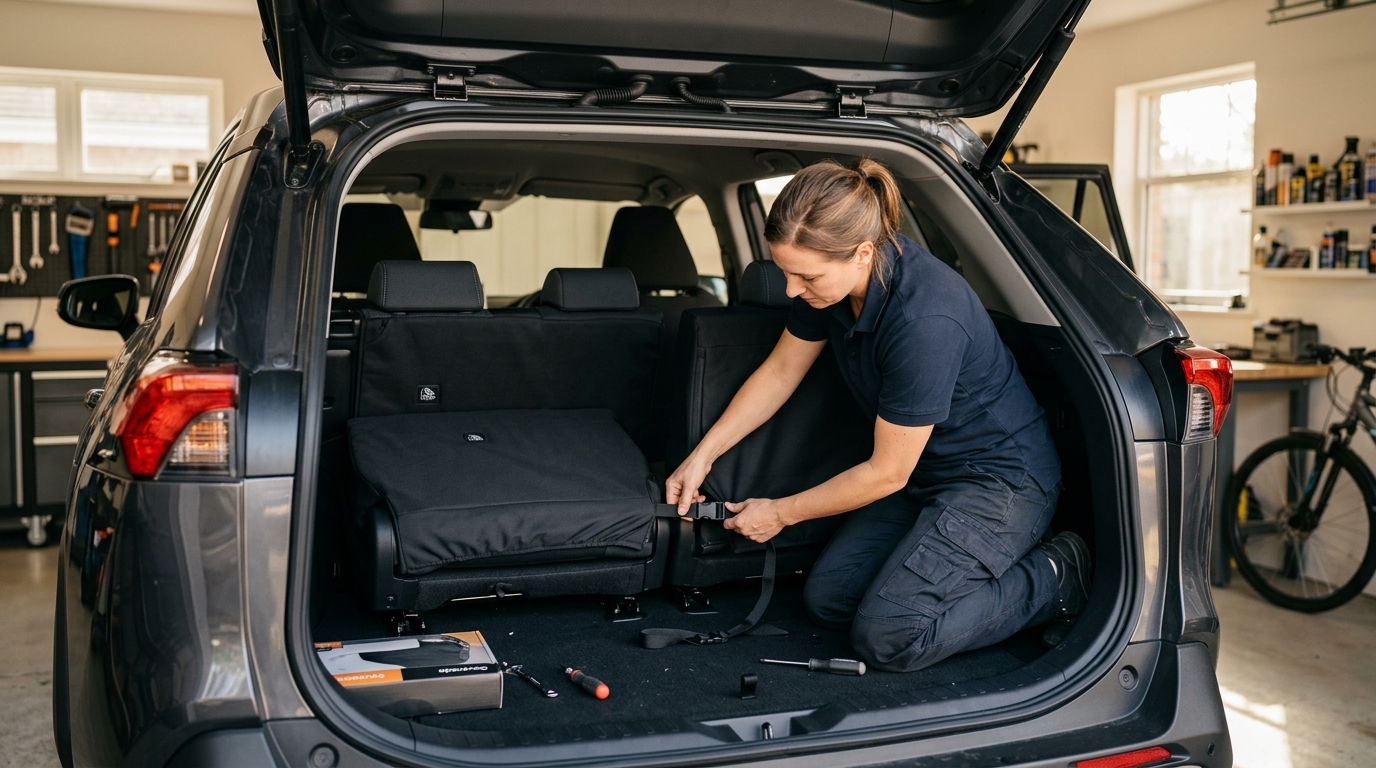
Most SUVs and trucks use 60/40 split folding. Some sedans use 60/40 with a center armrest. Larger SUVs, including certain Chevrolet Suburban, GMC Yukon XL, and Kia Telluride trims, may use second-row captain's chairs or third-row split benches. The installation goal stays the same: each folding section should move without dragging the cover across the neighboring section.
Install the larger side first, but don't fully tighten it. Then align the smaller side and check the split seam. Once both sides fold separately, tighten in small steps: left strap, right strap, center strap, then repeat. Think of it like tightening lug nuts. You want even pressure, not one heroic pull.
This is also where product fit matters. Coverado rear seat covers are built for everyday rear-seat problems: kids climbing in with cleats, dogs stepping on the bench, coffee on the fold-down armrest, and passengers who need the buckle now, not after you fish under the fabric. We also update designs weekly through our in-house design team, so protection doesn't have to look like a utility tarp.
Avoid routing straps through the split-fold hinge. The hinge area moves under load, and a strap there can rub, pop loose, or stop the seat back from locking fully upright. After installation, fold each section down and slam it gently back into place. You should hear the latch click.
Bench Cover Tightening
Tight covers look better, but over-tight covers cause most rear-seat installation failures.

The right fit is snug across the sitting surface and relaxed around functional points. That means the middle of the bench can be tight while the LATCH pockets, buckle slots, armrest seam, and split-fold seam stay open. A rear cover doesn't need to behave like upholstery to work well.
Follow this tightening order:
- Smooth the seat-bottom fabric from center to outer edges.
- Set the seat-back panel height under the headrests.
- Feed straps behind the seat back, away from LATCH and tether anchors.
- Connect hooks or clips to stable points, not wiring or child-seat hardware.
- Tighten until wrinkles flatten, then stop.
- Recheck buckles, armrest, headrests, and folding movement.
A word on "extra" flaps: they usually manage slack. On universal or semi-custom rear covers, a flap may tuck into the seat crease to hold the cover in place. If that flap blocks lower anchors, don't force it deeper. Shift the flap slightly above or below the anchor opening so your child-seat connector still reaches metal without fabric in the way.
For front-row installation, the problem changes from LATCH access to seat controls, airbags, and adjustment switches. If you're doing the whole cabin in one session, install the rear first, then use our guide to install front seat covers without covering power controls or recline levers.
Rear Seat Troubleshooting
If something feels off, diagnose by function, not appearance.
The cover looks centered, but the buckle disappeared? Loosen the nearest lower strap and pull the buckle stalk up through its opening. The seat folds halfway, then catches? Check whether a strap crosses the split hinge. The armrest opens, but the cupholder lid rubs? Move tension away from the center seam and toward the outer lower corners.
Here are the common fixes:
| Problem | Likely cause | Best fix |
|---|---|---|
| LATCH anchor covered | Fabric tucked too deep in crease | Pull fabric back and leave anchor pocket open |
| Buckle button hidden | Seat-bottom panel shifted sideways | Recenter before tightening lower straps |
| Armrest trapped | Center seam pulled too tight | Loosen middle tension and align armrest cutout |
| Seat won't fold | Strap crosses hinge or latch path | Re-route strap behind fixed seat structure |
| Headrest won't lock | Cover blocks post holes | Remove, align holes, reinstall headrest |
| Extra clips left over | Kit supports multiple seat layouts | Use only parts needed for your bench style |
When does this advice not apply? If your vehicle has seat-integrated airbags in the rear seat back, built-in child booster seats, removable second-row captain's chairs, or aftermarket racing harness hardware, follow the vehicle manual and cover manufacturer instructions first. A universal rear bench method isn't enough for those setups.
Coverado rear covers are designed for installation in under 30 minutes based on customer reviews, but take the full 30 if you carry kids, use the center armrest daily, or fold seats often for cargo. Fast is fine. Verified is better.
FAQ
Can covers block LATCH anchors?
Yes, a rear seat cover can block lower LATCH anchors if fabric is tucked too deep into the seat crease. Keep each anchor opening visible and reachable before tightening straps.
Are rear covers safe for car seats?
Rear covers can be safe when they don't interfere with the child restraint, LATCH anchors, tether anchors, or seat-belt path. Always follow the child-seat manual and vehicle owner's manual.
Why are extra clips included?
Extra clips support different rear bench layouts, including split-fold seats, fixed benches, and armrest openings. You may not need every piece in the kit.
Should armrests stay usable?
Yes. A properly installed rear seat cover should let the fold-down armrest, cupholders, buckles, headrests, and split-fold seats work normally.
For a clean rear seat cover installation, don't start by pulling straps tight. Start by protecting access: LATCH anchors, buckles, armrests, and folding seams first, fabric second. Coverado gives you free shipping, 30-day free returns, and an 18-month warranty, so you can choose a rear cover that protects the seat without fighting the way your vehicle is built.